Making soft and tender roti is an art that involves more than just mixing flour and water. It's about choosing the right ingredients, technique, and most importantly, a touch of love. Each step, from selecting the flour to how you store your roti, plays a crucial role in the final softness of the bread.
In this guide, we'll dive into the fundamental aspects of keeping your roti melt-in-your-mouth soft. Whether you’re a seasoned cook or a beginner, understanding these simple tips can elevate your roti game to the next level. Say goodbye to tough and dry flatbreads, and relish the satisfying fluffiness of perfectly made roti.
- Choosing the Right Ingredients
- Perfecting the Dough
- Mastering the Cooking Technique
- Storing Roti for Softness
Choosing the Right Ingredients
The journey to soft roti begins in your pantry, with the choice of ingredients setting the stage for the texture and flavor of this beloved flatbread. Flour, the heart of roti, significantly influences the final result. Whole wheat flour, known in Indian households as 'atta', is preferred due to its optimal balance of protein and fiber. This balance helps in forming the desired elasticity in the dough, resulting in a soft and pliable roti. It's important to sift the flour before using it to ensure there are no lumps, which could compromise the texture.
When it comes to water, the temperature can make a difference. Some roti experts advocate for the use of warm water when making the dough. This tip stems from the fact that warm water helps in activating the gluten in flour more effectively, promoting softness and elasticity. However, water quality should also be considered, as hard water might affect the dough's consistency. Soft, filtered water is ideal to provide the best texture in your roti dough.
Adding a fat element, such as oil or ghee, during dough preparation is crucial for achieving a soft roti. An ideal amount is about one teaspoon of oil for every cup of flour used. The fat coats the flour particles, preventing too much gluten formation. This has the delightful side effect of yielding a tender roti. Some experienced cooks suggest incorporating a pinch of salt into the flour. This isn't just for flavor; salt can enhance the strength of the dough and improve its elasticity, supporting a softer finish.
One often overlooked ingredient in making a perfect roti is time. Allowing the dough to rest is as critical as the choice of flour or water. Resting the dough for at least 15 to 30 minutes allows the gluten to relax, making the rolling-out process smoother and the final roti softer. During this rest period, cover the dough with a damp cloth to prevent loss of moisture, which is key to maintaining a soft texture.
According to renowned chef Madhur Jaffrey, "The simplest of foods require the deepest understanding of their elements to turn them into something truly comforting." This philosophy deeply resonates with the art of making roti, where each ingredient brings its own touch to the dish.
Many households explore adding other kitchen staples like yogurt or milk as substitutes for water. These ingredients can introduce a tenderness and slight tangy flavor that some find enhances their roti recipe. However, these alternatives should be used with an understanding of desired texture and taste preferences. Each variation can subtly shift the roti's character, bringing innovation to tradition.
To conclude this ingredient chapter, keeping your components measured and considered lays a sturdy foundation for roti making. Pay attention to quality, balance, and sometimes even experimentation to achieve the perfect harmony in your flatbread. Inevitably, the softness of your roti will emerge as a tribute to the thoughtful selection and harmony of your chosen ingredients.

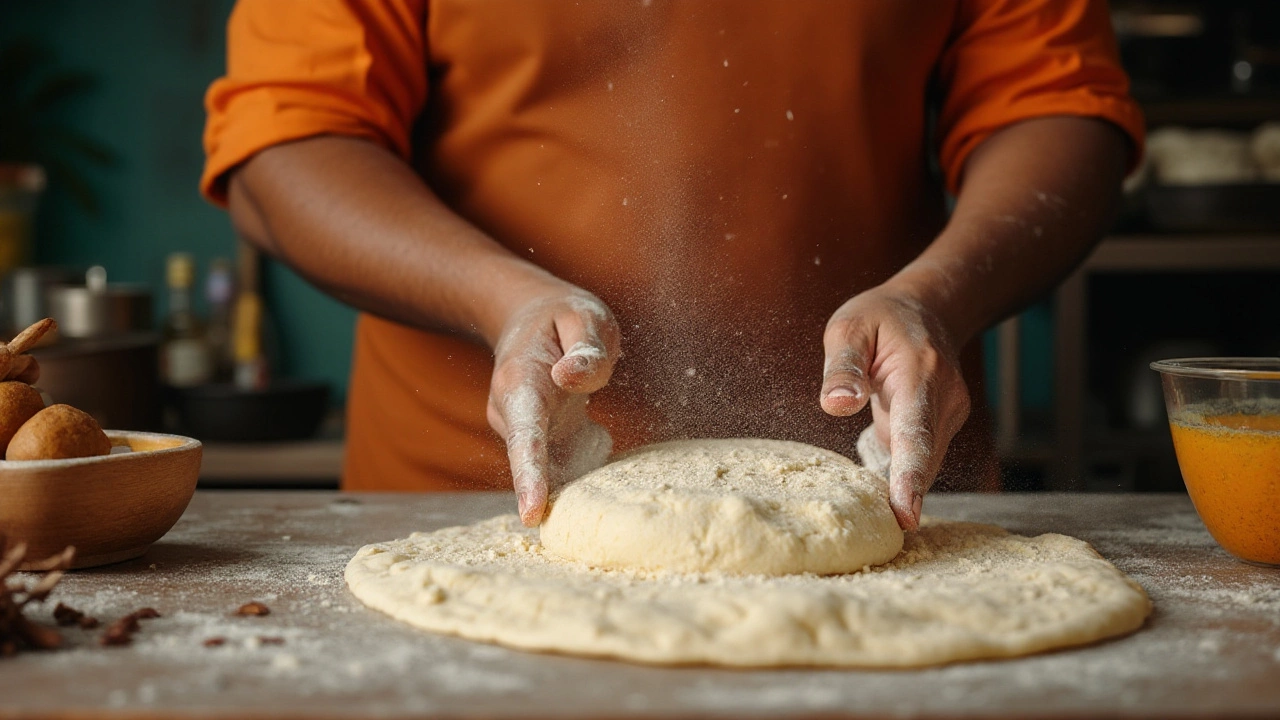
Perfecting the Dough
The heart of a soft roti lies in the dough's preparation, a delicate balance that transforms basic ingredients into a tender delight. The key to mastering this stage begins with selecting the right ingredients: fresh, high-quality whole wheat flour is fundamental. Many home cooks swear by 'atta,' a finely milled flour, which is best known for its balance of fiber and protein, contributing to the softness of the dough. But that's not all. The use of water at the correct temperature, tepid rather than cold, is crucial for activating both the natural gluten in the flour and any yeast or baking powder that may be added to achieve a pliable texture.
Once the ingredients are assembled, it's time to knead. Kneading is not just a mechanical process; it's an opportunity to infuse energy into your dough. A gentle yet firm hand should be used to fold the dough upon itself repeatedly. This helps to develop the gluten network, which is essential for the dough's elasticity. Typically, kneading should last between 8 to 10 minutes. Remember to let the dough rest afterwards. Resting allows the gluten to relax, making it easier to roll out, and it hydrates the grains, resulting in a softer texture upon cooking.
Interestingly, hydration levels of the dough play a pivotal role. A dough that is too dry will result in a hard roti, while one that is overly wet will be sticky and difficult to handle. Aim for a dough that is supple, slightly sticky to touch, but not so much that it clings to your fingers. Adjusting hydration levels might need practice as it depends on the flour's moisture content, which can vary based on the climate and storage conditions. Some cooks recommend 'feel testing'—a pinch technique that helps gauge moisture: pinch a small portion of dough, if it easily separates without sticking, the water content is just right.
"The secret to soft roti is a pliable, well-hydrated dough," says renowned chef Anita Jaisinghani, emphasizing that attention to hydration can make a marked difference in the final product.
At times, adding a touch of vegetable oil or ghee during the kneading process can also aid in achieving a less sticky dough and impart a slight richness which complements the inherent flavor of soft roti. Remember to cover your dough with a damp cloth during its rest to prevent it from drying out. Aim to let it rest for at least 30 minutes. The damp cloth captures humidity, maintaining the dough's moisture level, ensuring a wonderfully soft and pliable foundation ready to be rolled into your desired roti.
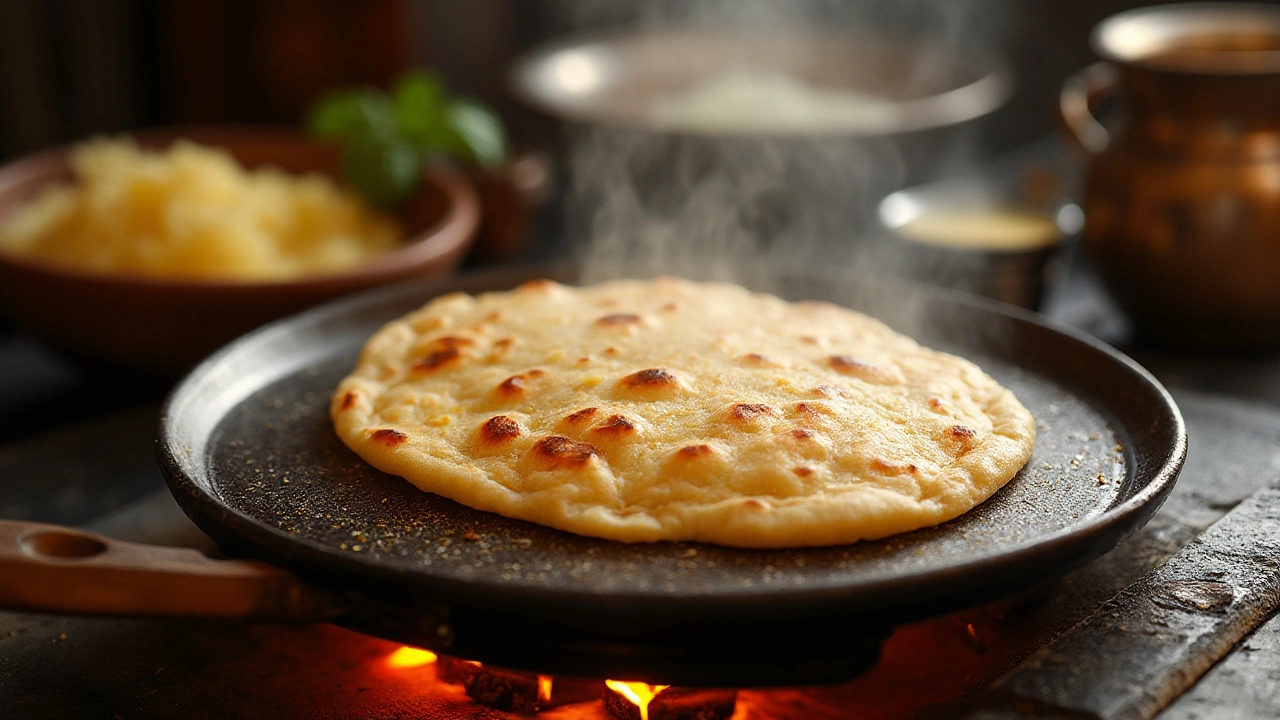
Mastering the Cooking Technique
Mastering the cooking technique is crucial to achieving that perfect, soft roti that stays pliable and inviting even hours after cooking. At the heart of the process lies the need for balance between heat and dough. Many home cooks find themselves tweaking temperatures to find that sweet spot where the roti puffs up beautifully yet remains soft. The importance of preheating the pan, or tawa, cannot be overstated. A moderately hot tawa ensures that the roti cooks evenly from the inside out, preventing the dreaded hardening of the crust. The initial contact should sear lightly, trapping steam within, which helps in the brilliant puffing up of the roti.
Watching the timing is equally essential. Adept roti makers develop an instinct for the perfect moment to flip, often just as tiny bubbles begin to form and a delicate golden hue spreads across the surface. Flipping too early can lead to uncooked sections while flipping too late results in a tough exterior. It's a dance-like movement, switching between fingers and tools to ensure even cooking. The second side requires lesser cooking time, just enough to firm up and complement the taste developed in the initial stage.
"The secret to stellar chapati is in the flip," says renowned culinary expert Tarla Dalal. "A swift, confident flip ensures even cooking and softer results."
Additionally, many expert cooks prefer using their fingers for the final puffing. It sounds intimidating, but once mastered, the gentle press around the circumference with dexterous fingers while on an open flame helps achieve an even puff and perfect doneness. This stage also enhances flavor, as a few seconds on the open flame post-cooking brings in a lovely charred aroma without altering the softness.
The Importance of Temperature
The tawa's temperature is a key player in roti-making. If too hot, it might burn the outsides before cooking the inside, resulting in a dry, unappetizing roti. Too cold, and you’ll end up with a flat pancake rather than the fluffed traditional delight. Serious chefs know that warming up the tawa gradually during the preparation of the dough can align the timelines perfectly for cooking. Observing how a few drops of water dance upon the surface can be a simple test for readiness, ensuring your pan has reached the optimal temperature.
Finally, it's essential to remember the role of moisture and proper cooling. Wrapping freshly made rotis in a clean cloth and storing them in an insulated container retains their softness by preserving moisture. The trapped steam keeps each piece tender and pliable. So, the process doesn't end with cooking; how you handle them post-cooking bears substantially on their ultimate texture and taste.

Storing Roti for Softness
After all the effort put into making perfectly soft **roti**, keeping them soft after cooking is just as important. How you store your roti can significantly impact their texture and taste. Have you ever noticed that freshly-cooked roti cools down to an unpleasant stiffness if not stored properly? To avoid this, it’s essential to understand the right ways to keep them fresh and soft for longer periods.
One effective method is wrapping the freshly cooked roti in a clean, dry kitchen cloth or napkin. This cloth absorbs excess moisture and also provides insulation, both of which help in maintaining their softness. While the cloth does its job, it's equally crucial to find the right container for storage. Opt for an airtight container—this prevents air from drying out the roti and keeps them warm and tender. You can add a few drops of ghee or butter between them to enhance both flavor and softness, a trick often used by many homemakers.
"The secret to preserving the softness of a roti lies not just in its preparation but how you take care of it after cooking," says renowned chef Tarla Dalal in her culinary guide.
For those needing to store **soft roti** for more extended periods, such as overnight, refrigeration can be considered, though it is not ideal. When you must refrigerate, ensure each roti is separated by layers of parchment paper before placing them in an airtight container. This not only keeps them fresh but allows for easy reheating. When it comes to reheating, wrapping them in foil and gently heating them over a tava or in an oven can reimpart the warmth and suppleness. But beware, microwaving might dry out the roti, undermining all your efforts to maintain their soft texture.
Long-Term Storage for Roti
If you plan to store **roti** for more than a couple of days, freezing them is a reliable option. The key is to ensure they are fully cooled and wrapped individually in plastic wrap or foil before placing them in a freezer bag. Freezing halts the staling process, allowing you to enjoy soft roti whenever you need them. When ready to eat, allow the frozen roti to thaw at room temperature and then reheat them as described earlier to bring back their tenderness.
Finally, remember that the material of the storage container can also contribute to the end result. Stainless steel containers are popular for their insulation properties, keeping the heat intact for longer durations, while plastic or glass containers are easier for longer storage. Every step, from the moment the roti is cooked until it's consumed, requires careful attention to detail. With these storage tips, savoring fresh, soft roti anytime becomes an achievable delight, even for snacks later in the day. Transform meals with this everyday flatbread, preserving its softness as effortlessly as you make it!